Hosting & Deployment Guide
此内容尚不支持你的语言。
Since Hugo generates a static website (HTML/CSS/JS), you can host it anywhere for free! We recommend Netlify for the best balance of features and ease of use.
Choose a Provider
Section titled “Choose a Provider”Netlify
Section titled “Netlify”Best for: Most users, especially those needing CMS support, forms, or headers.
-
Push to GitHub Ensure your site code is pushed to a GitHub repository.
-
Import to Netlify
- Log in to Netlify.
- Click Add new site > Import an existing project.
- Select GitHub and authorize.
- Choose your repository.
-
Configure Build Netlify usually detects Hugo automatically, but verify these settings:
- Build Command:
hugo --gc --minify - Publish Directory:
public
- Build Command:
-
Deploy Click Deploy site. Netlify will build your site and give you a live URL (e.g.,
vibrant-name-123.netlify.app).
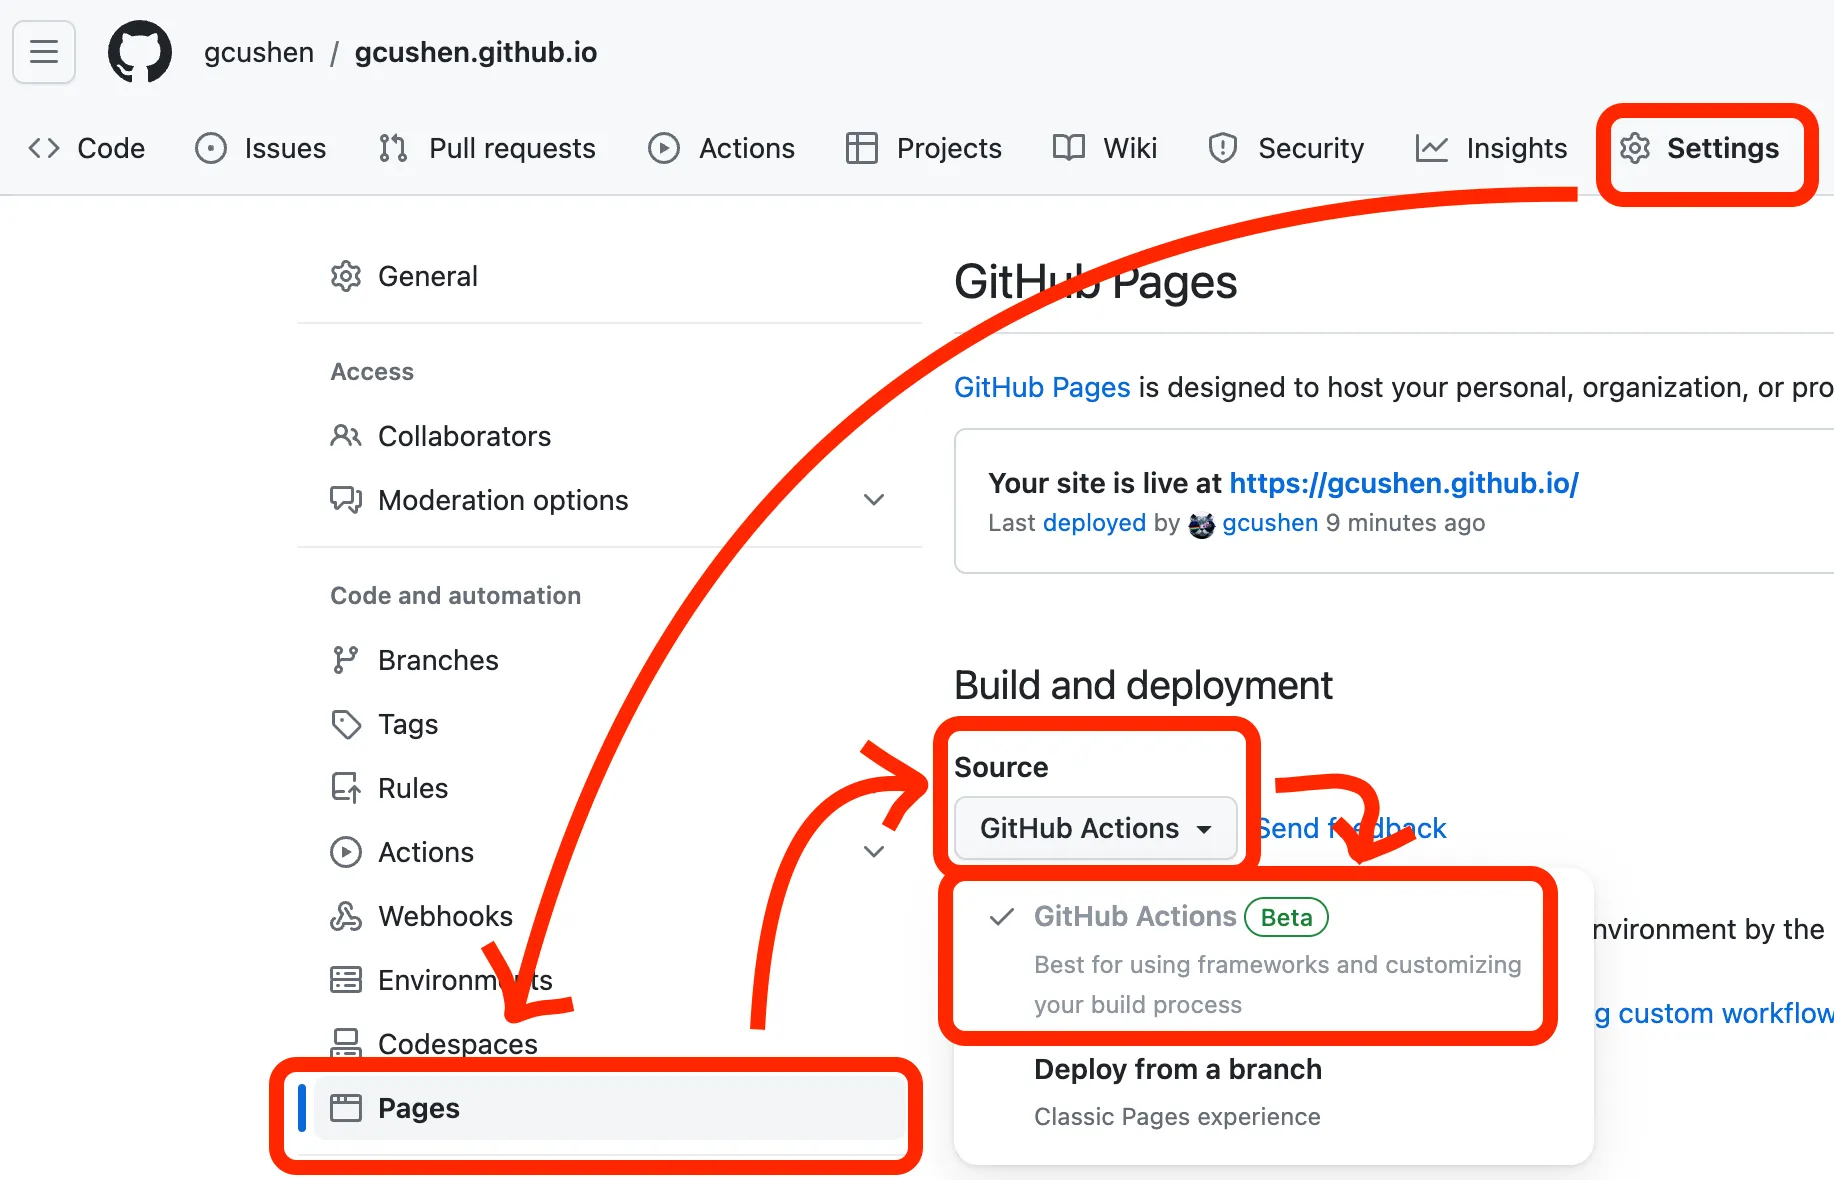
GitHub Pages
Section titled “GitHub Pages”Best for: Simple sites kept entirely within the GitHub ecosystem.
-
Configure Workflow Create
.github/workflows/publish.yamlin your repo: View Workflow File -
Enable Pages
- Go to repo Settings > Pages.
- Under Source, select GitHub Actions.
-
Trigger Build
- Go to the Actions tab.
- Select Deploy Website on the left.
- Click Run workflow.
Cloudflare Pages
Section titled “Cloudflare Pages”Best for: High traffic sites requiring edge performance.
-
Connect Git
- Log in to the Cloudflare Dashboard.
- Go to Workers & Pages > Create application > Pages > Connect to Git.
-
Configure Build
- Production branch:
main - Build command:
pnpm install && hugo --gc --minify && pnpm dlx pagefind --source "public" - Build directory:
public
- Production branch:
Vercel
Section titled “Vercel”Best for: Next.js users or those who prefer Vercel’s ecosystem.
-
Import Project Import your GitHub repo on the Vercel Dashboard.
-
Configure Settings
- Framework Preset: Hugo
- Build Command:
hugo --gc --minify && pnpm dlx pagefind --source "public" - Environment Variable: Add
HUGO_VERSION(e.g.,0.149.0) matching yourhugoblox.yaml.