Jupyter Notebooks
Jupyter Notebooks are a popular format with data scientists and analysts.
You can use the familiar Jupyter Lab environment to blog with Jupyter Notebooks.
Whenever a Jupyter Notebook is added or updated in the notebooks folder of your site, it will be published as a blog post.
Prerequisites
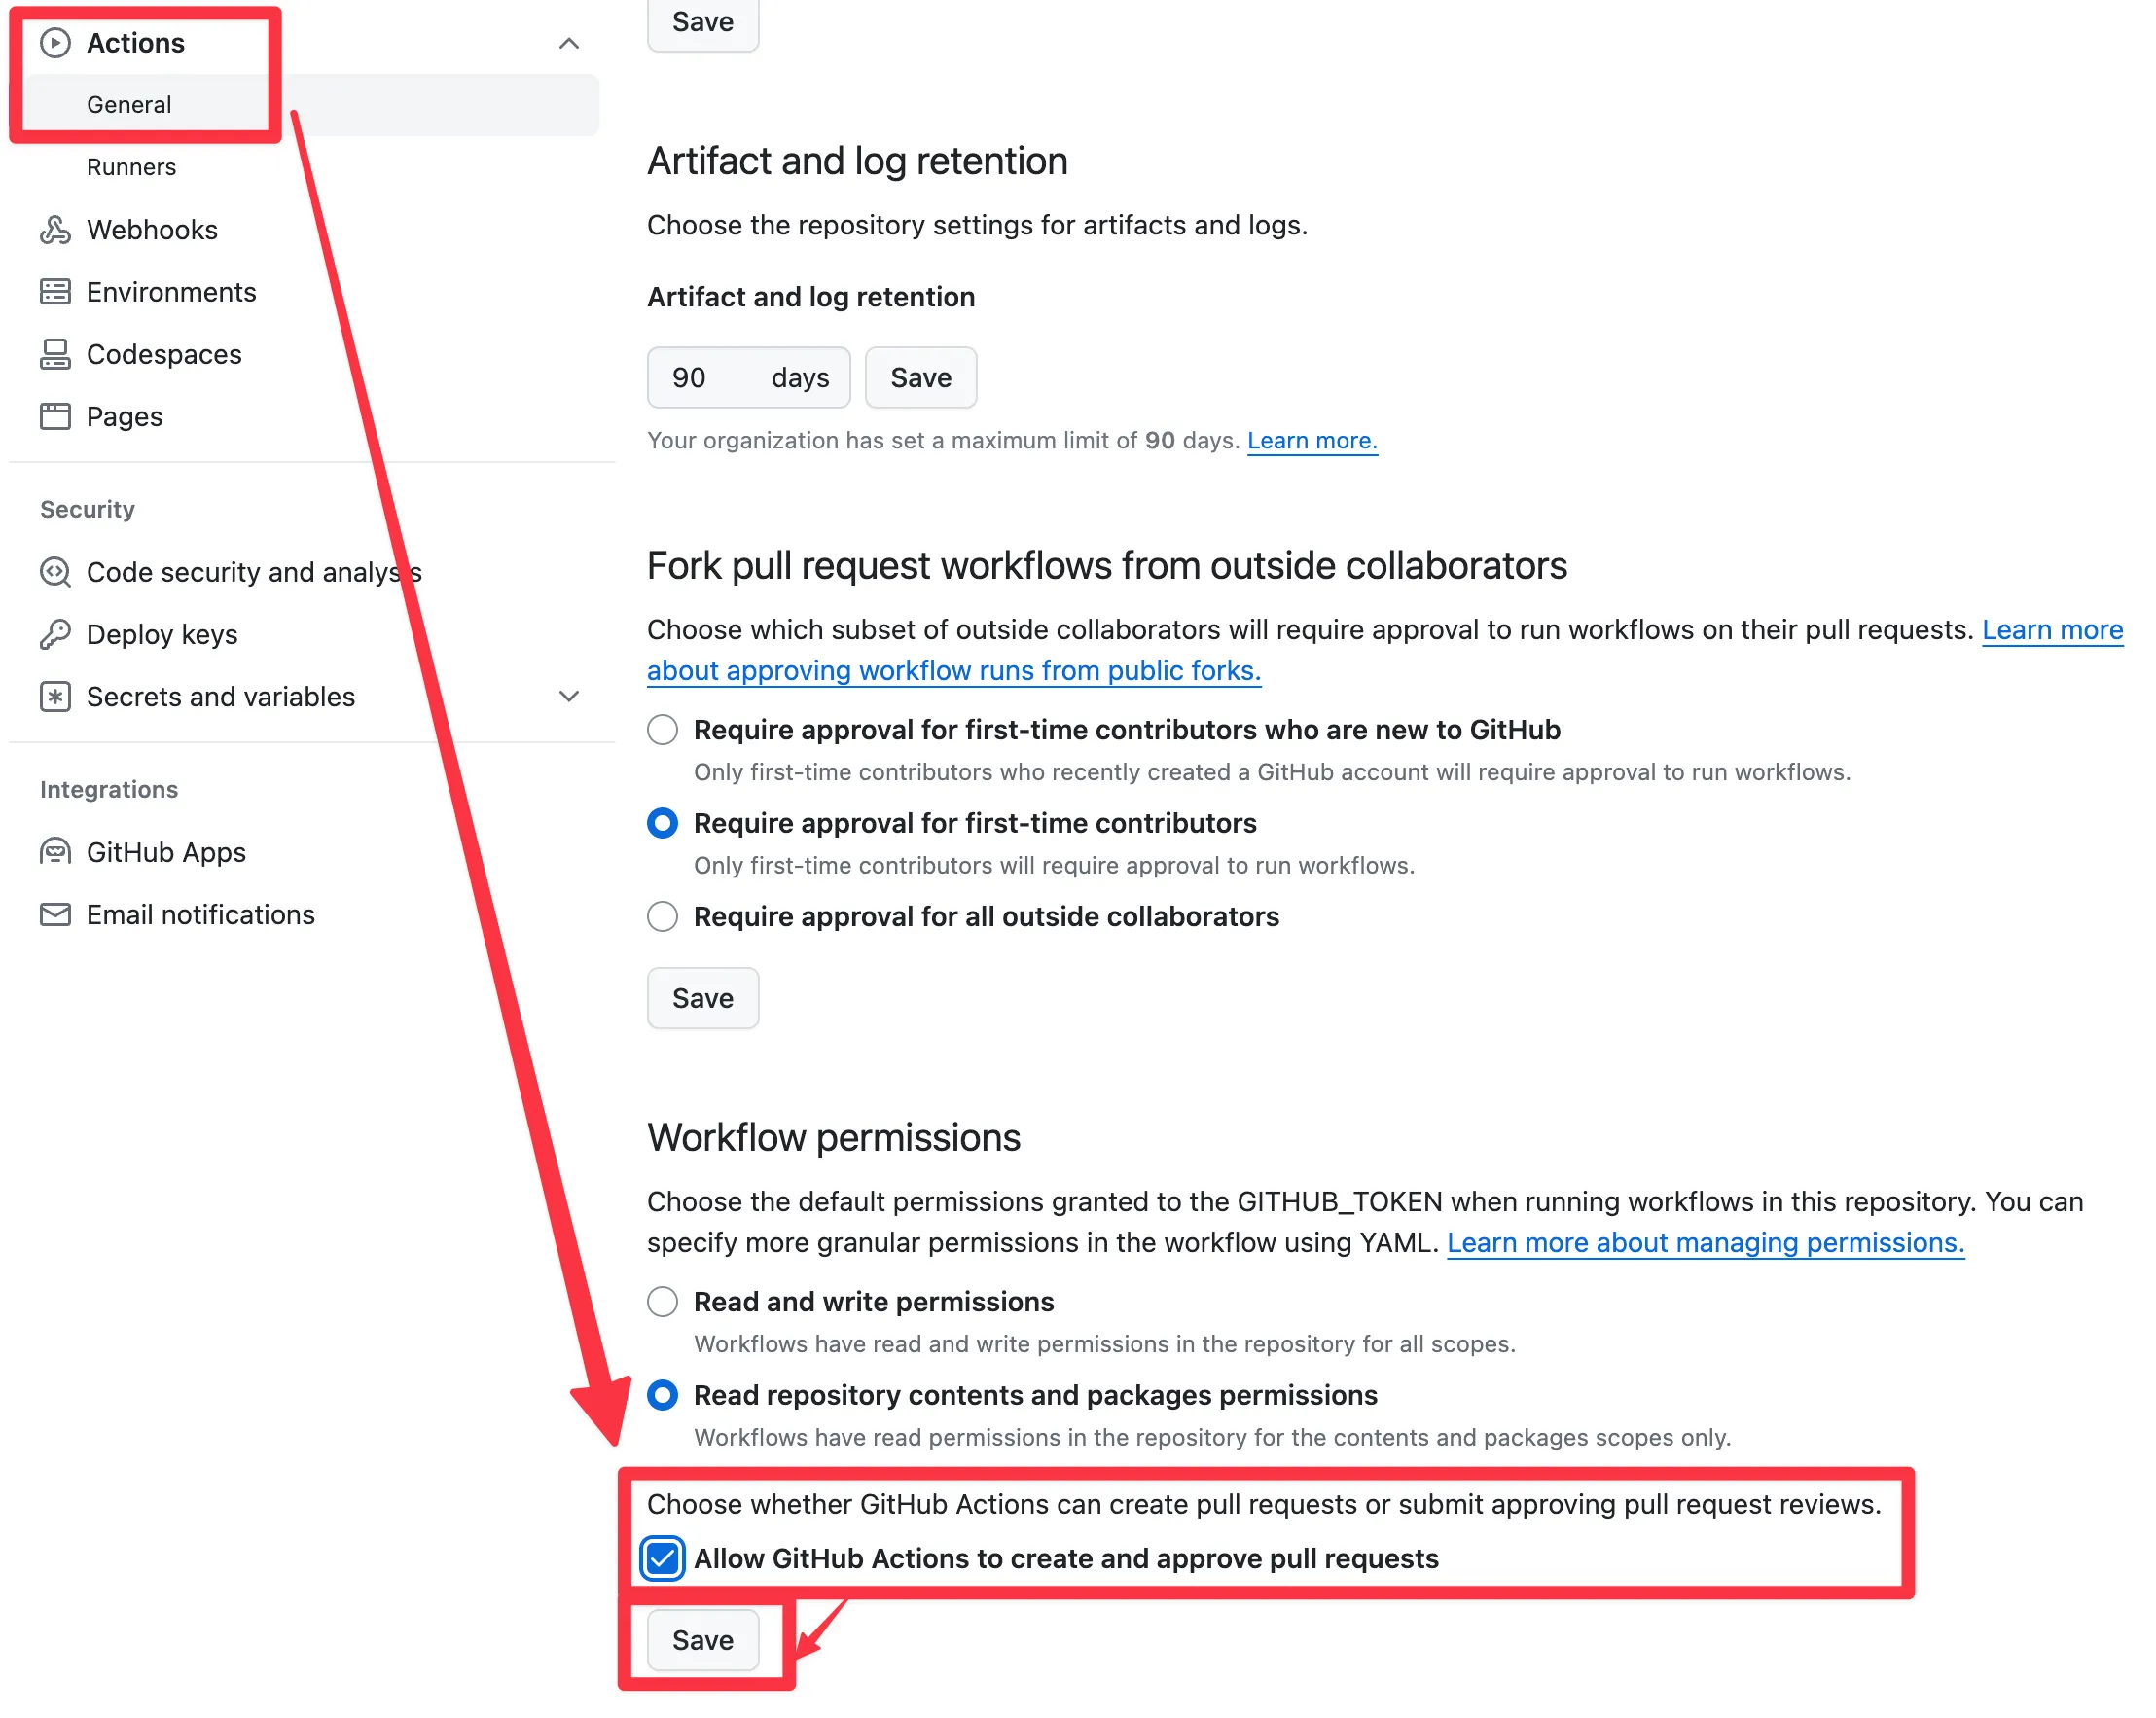
- In your GitHub repository, click the Settings tab at the top of the page, click Actions > General in the left menu, choose Allow and click Save
- Check that your repo has a file named
import-notebooksin the.github/workflows/folder. If it doesn’t, you can add the file from here.
Tutorial
Check out the Blog tutorial to learn how to automatically blog with Jupyter Notebooks.
Front Matter
Hugo Blox Builder has a large number of front matter options which can be used to specify page metadata and page features.
Default Options
The following default front matter options will be set for each notebook when it is imported:
title- attempt to get the title of the blog post from the top-level heading in the notebook. Therefore, we recommend making the first cell of the notebook a Markdown cell with a top-level Markdown heading in the form# My Blog Post Title.date- defaults to the date that the notebook was imported as a blog postslug(the URL of the page) - defaults to the filename of the Jupyter Notebook after being transformed into lowercase and spaces replaced with hyphens
Custom Options
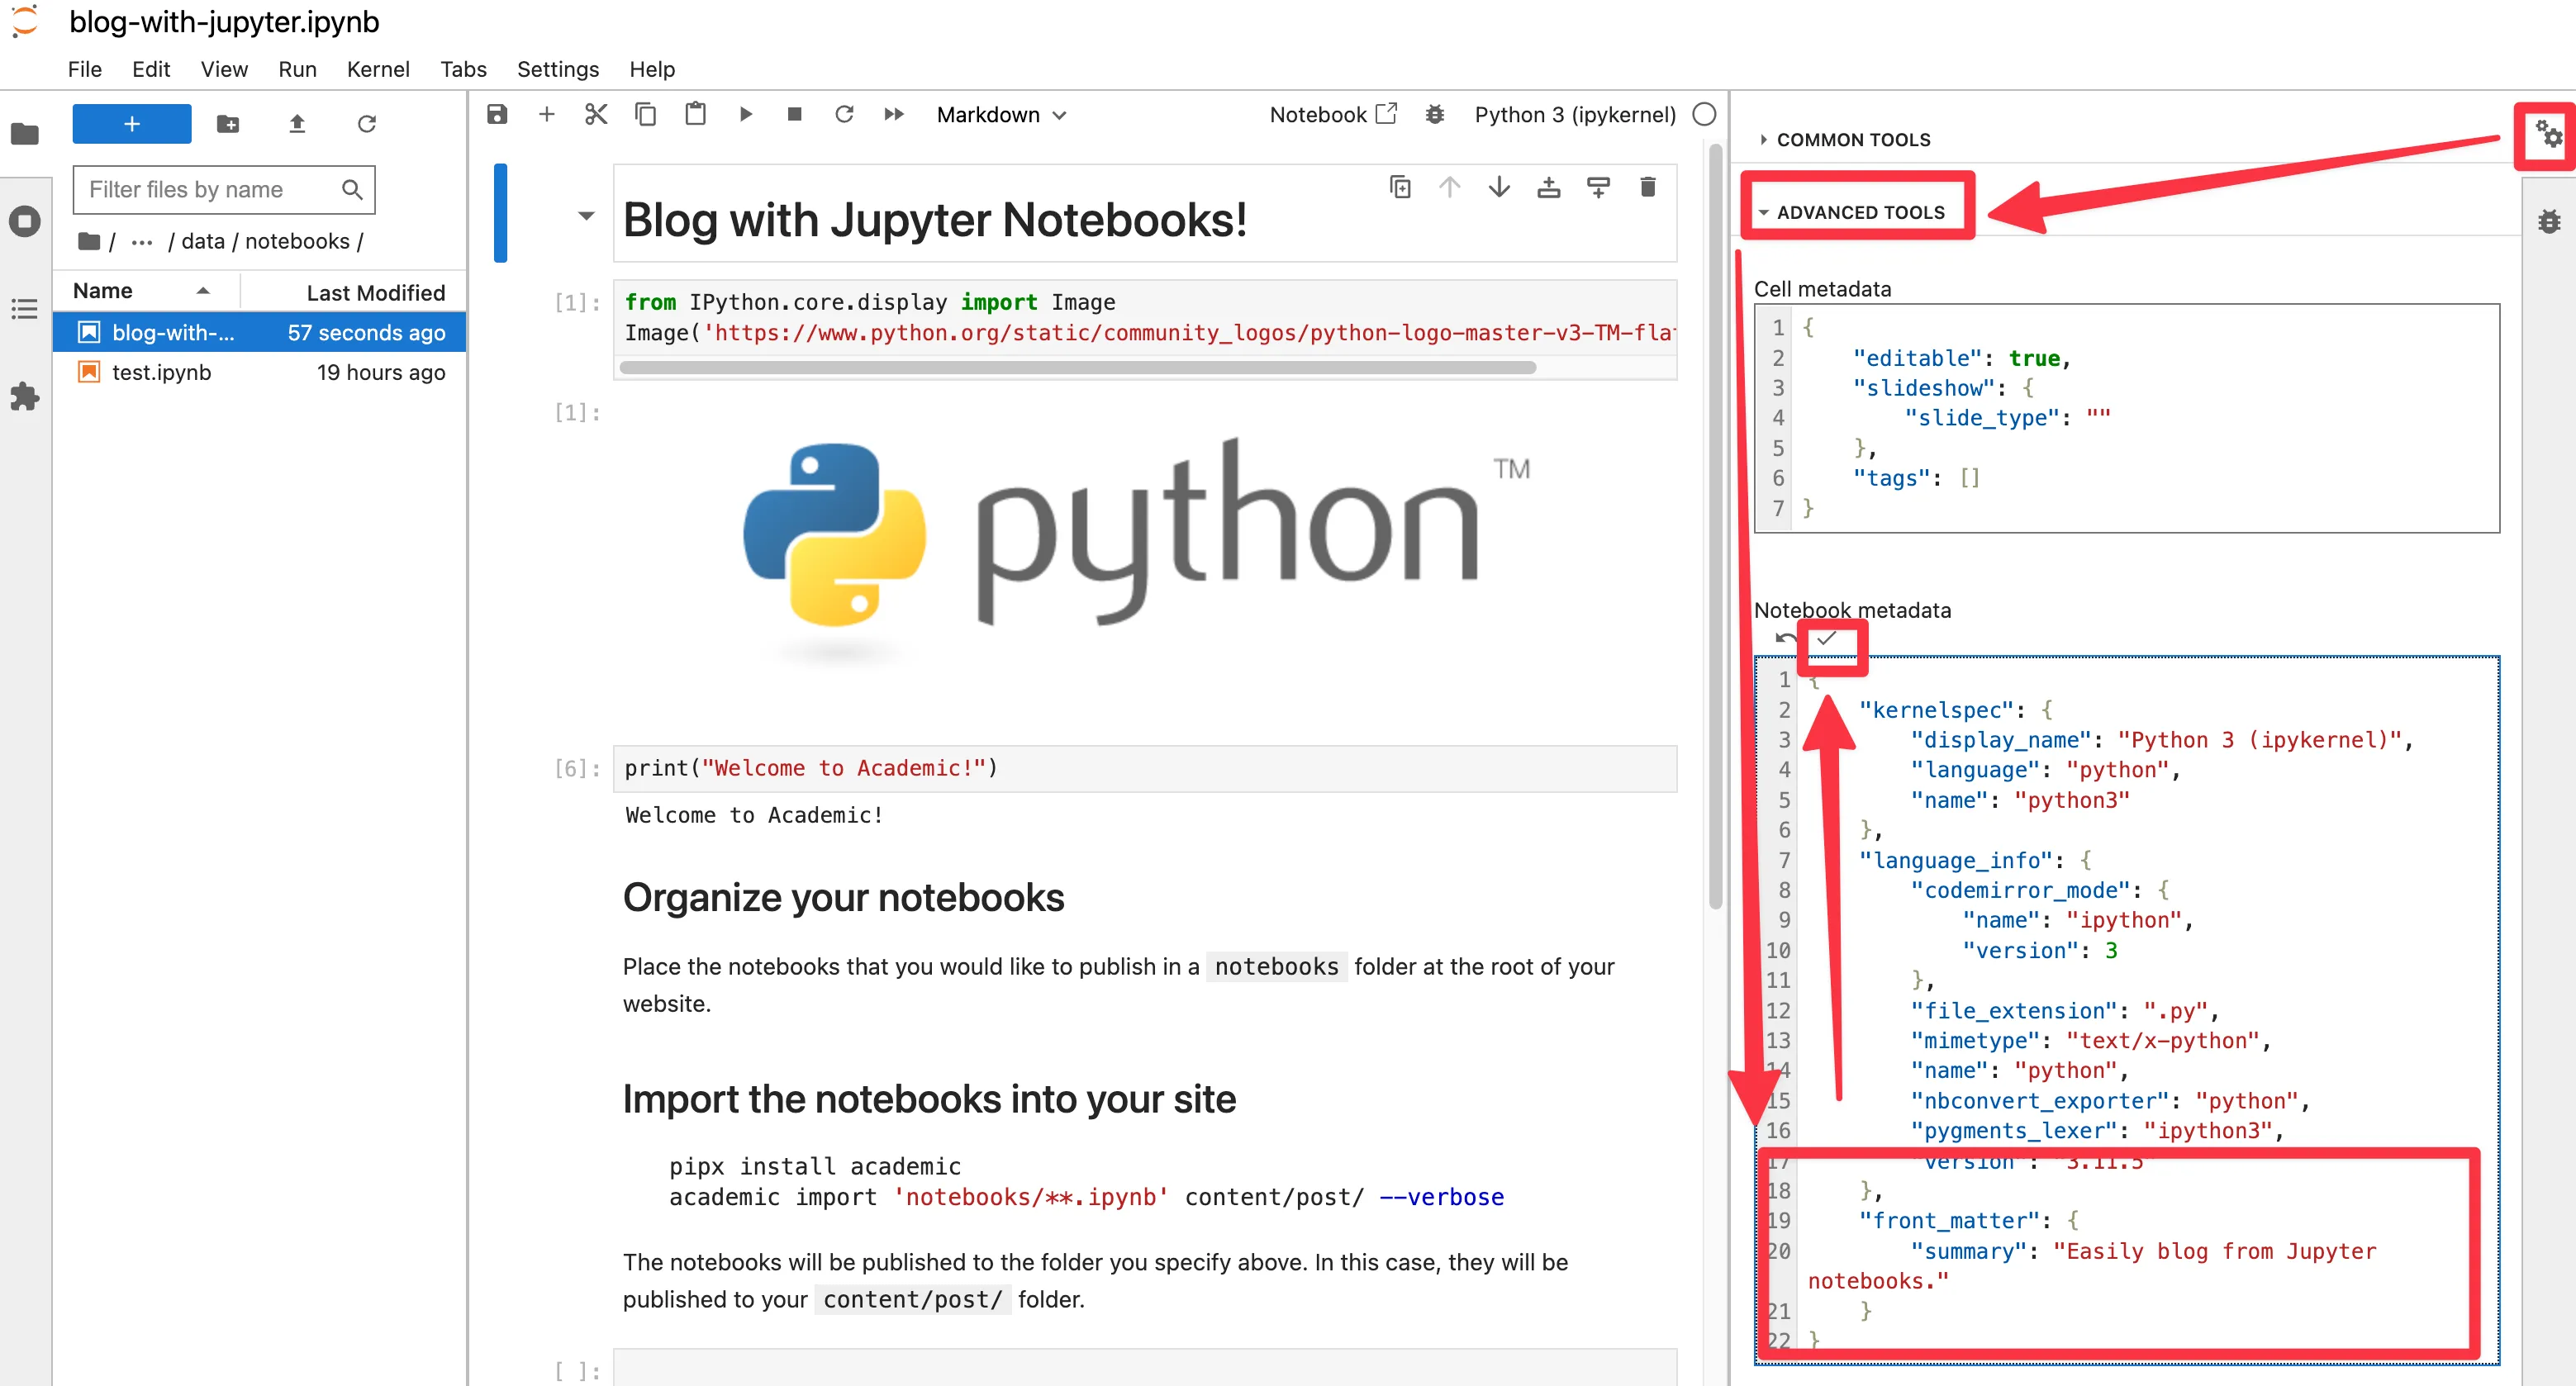
You can override these front matter options and add further options to your notebook by specifying options under the front_matter section of your notebook’s metadata field.
Jupyter formats the notebook metadata field in JSON, rather than YAML which is used by Hugo. Hence, you may find it helpful to use an online YAML to JSON converter to convert Hugo’s front matter options into the right format for Jupyter notebook.
Remember to click the tick button to save changes to the metadata field after making changes to it in Jupyter Lab:
Manual Import
Notebooks will be automatically imported whenever you add or change a notebook in the notebooks folder.
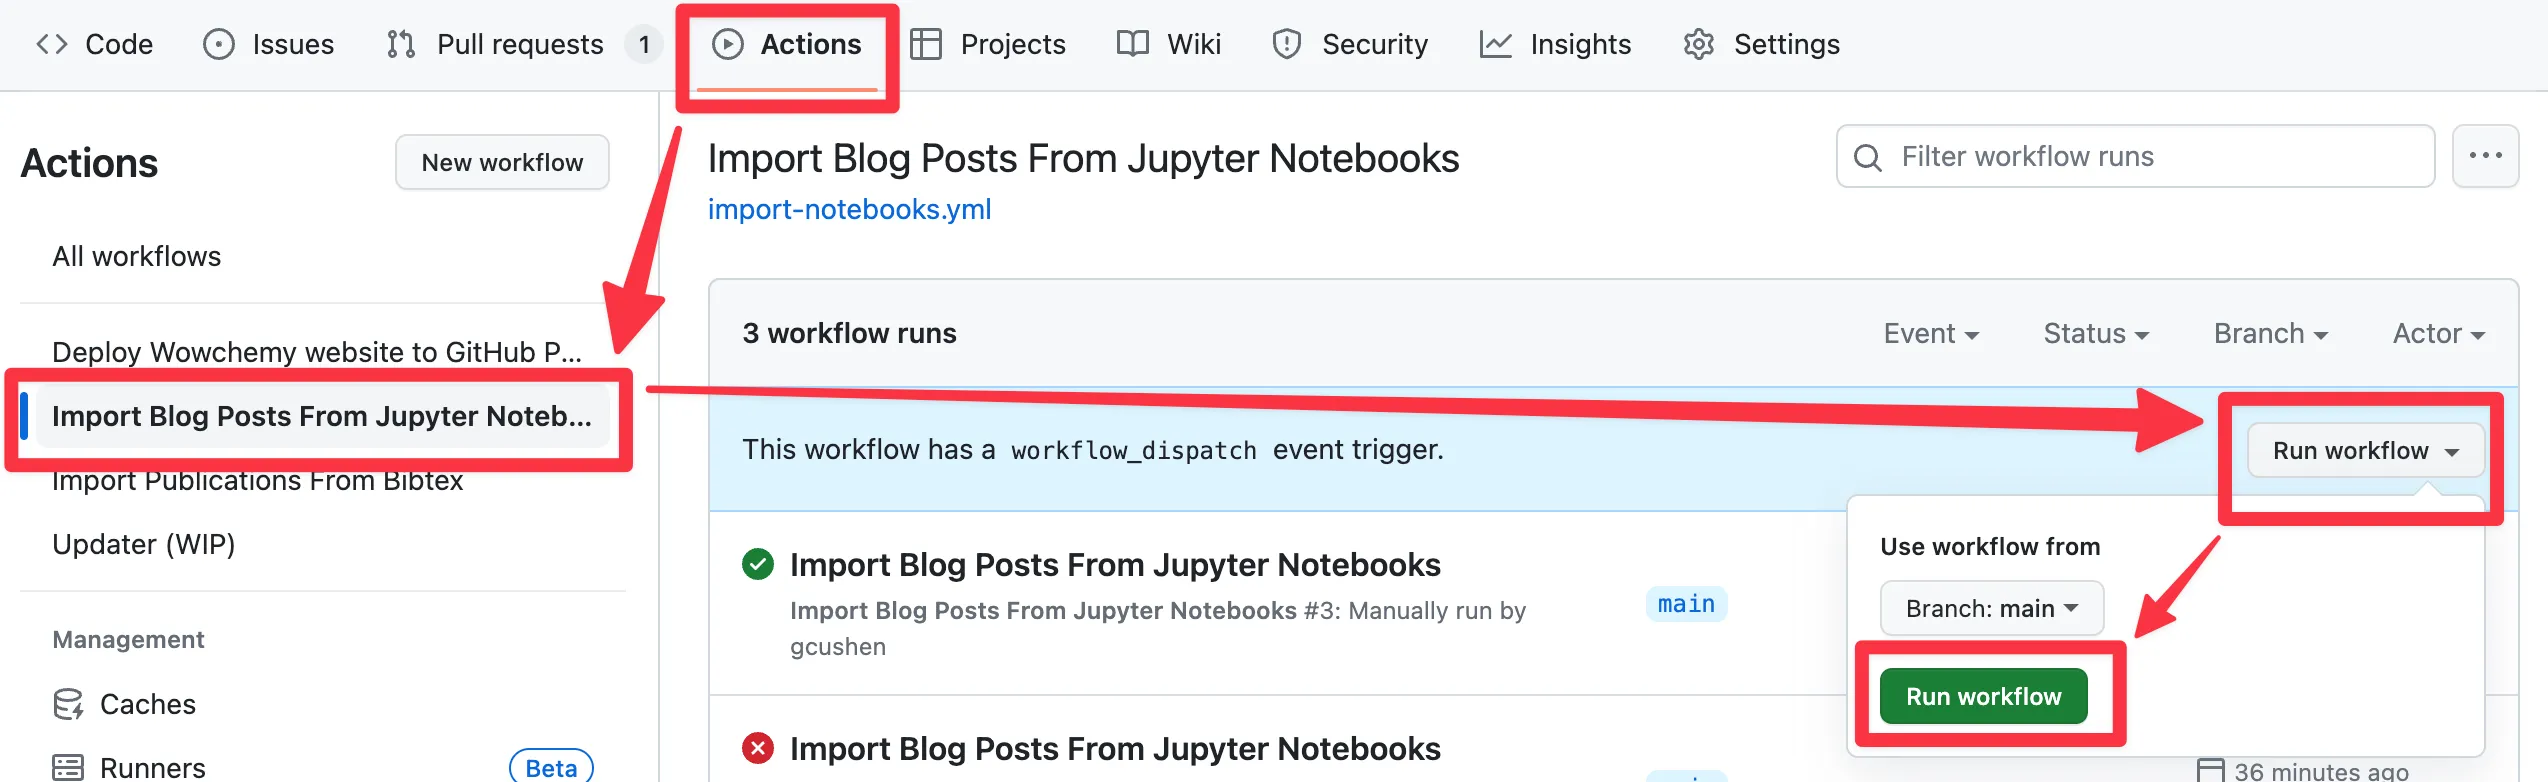
However, if you wish to manually run the importer, such as after resolving an error, you can do so by clicking Actions > Import Blog Posts > Run Workflow > Run Workflow:
Overwrite existing blog posts
If you update an existing notebook in the notebooks folder, you may want the changes to propagate to the published blog post.
By default, the importer tool won’t overwrite existing blog posts. To allow this, update the academic command in .github/workflows/import-notebooks.yml to add the --overwrite option:
academic import 'notebooks/*.ipynb' content/post/ --verbose --overwrite