Step 2: Edit Biography
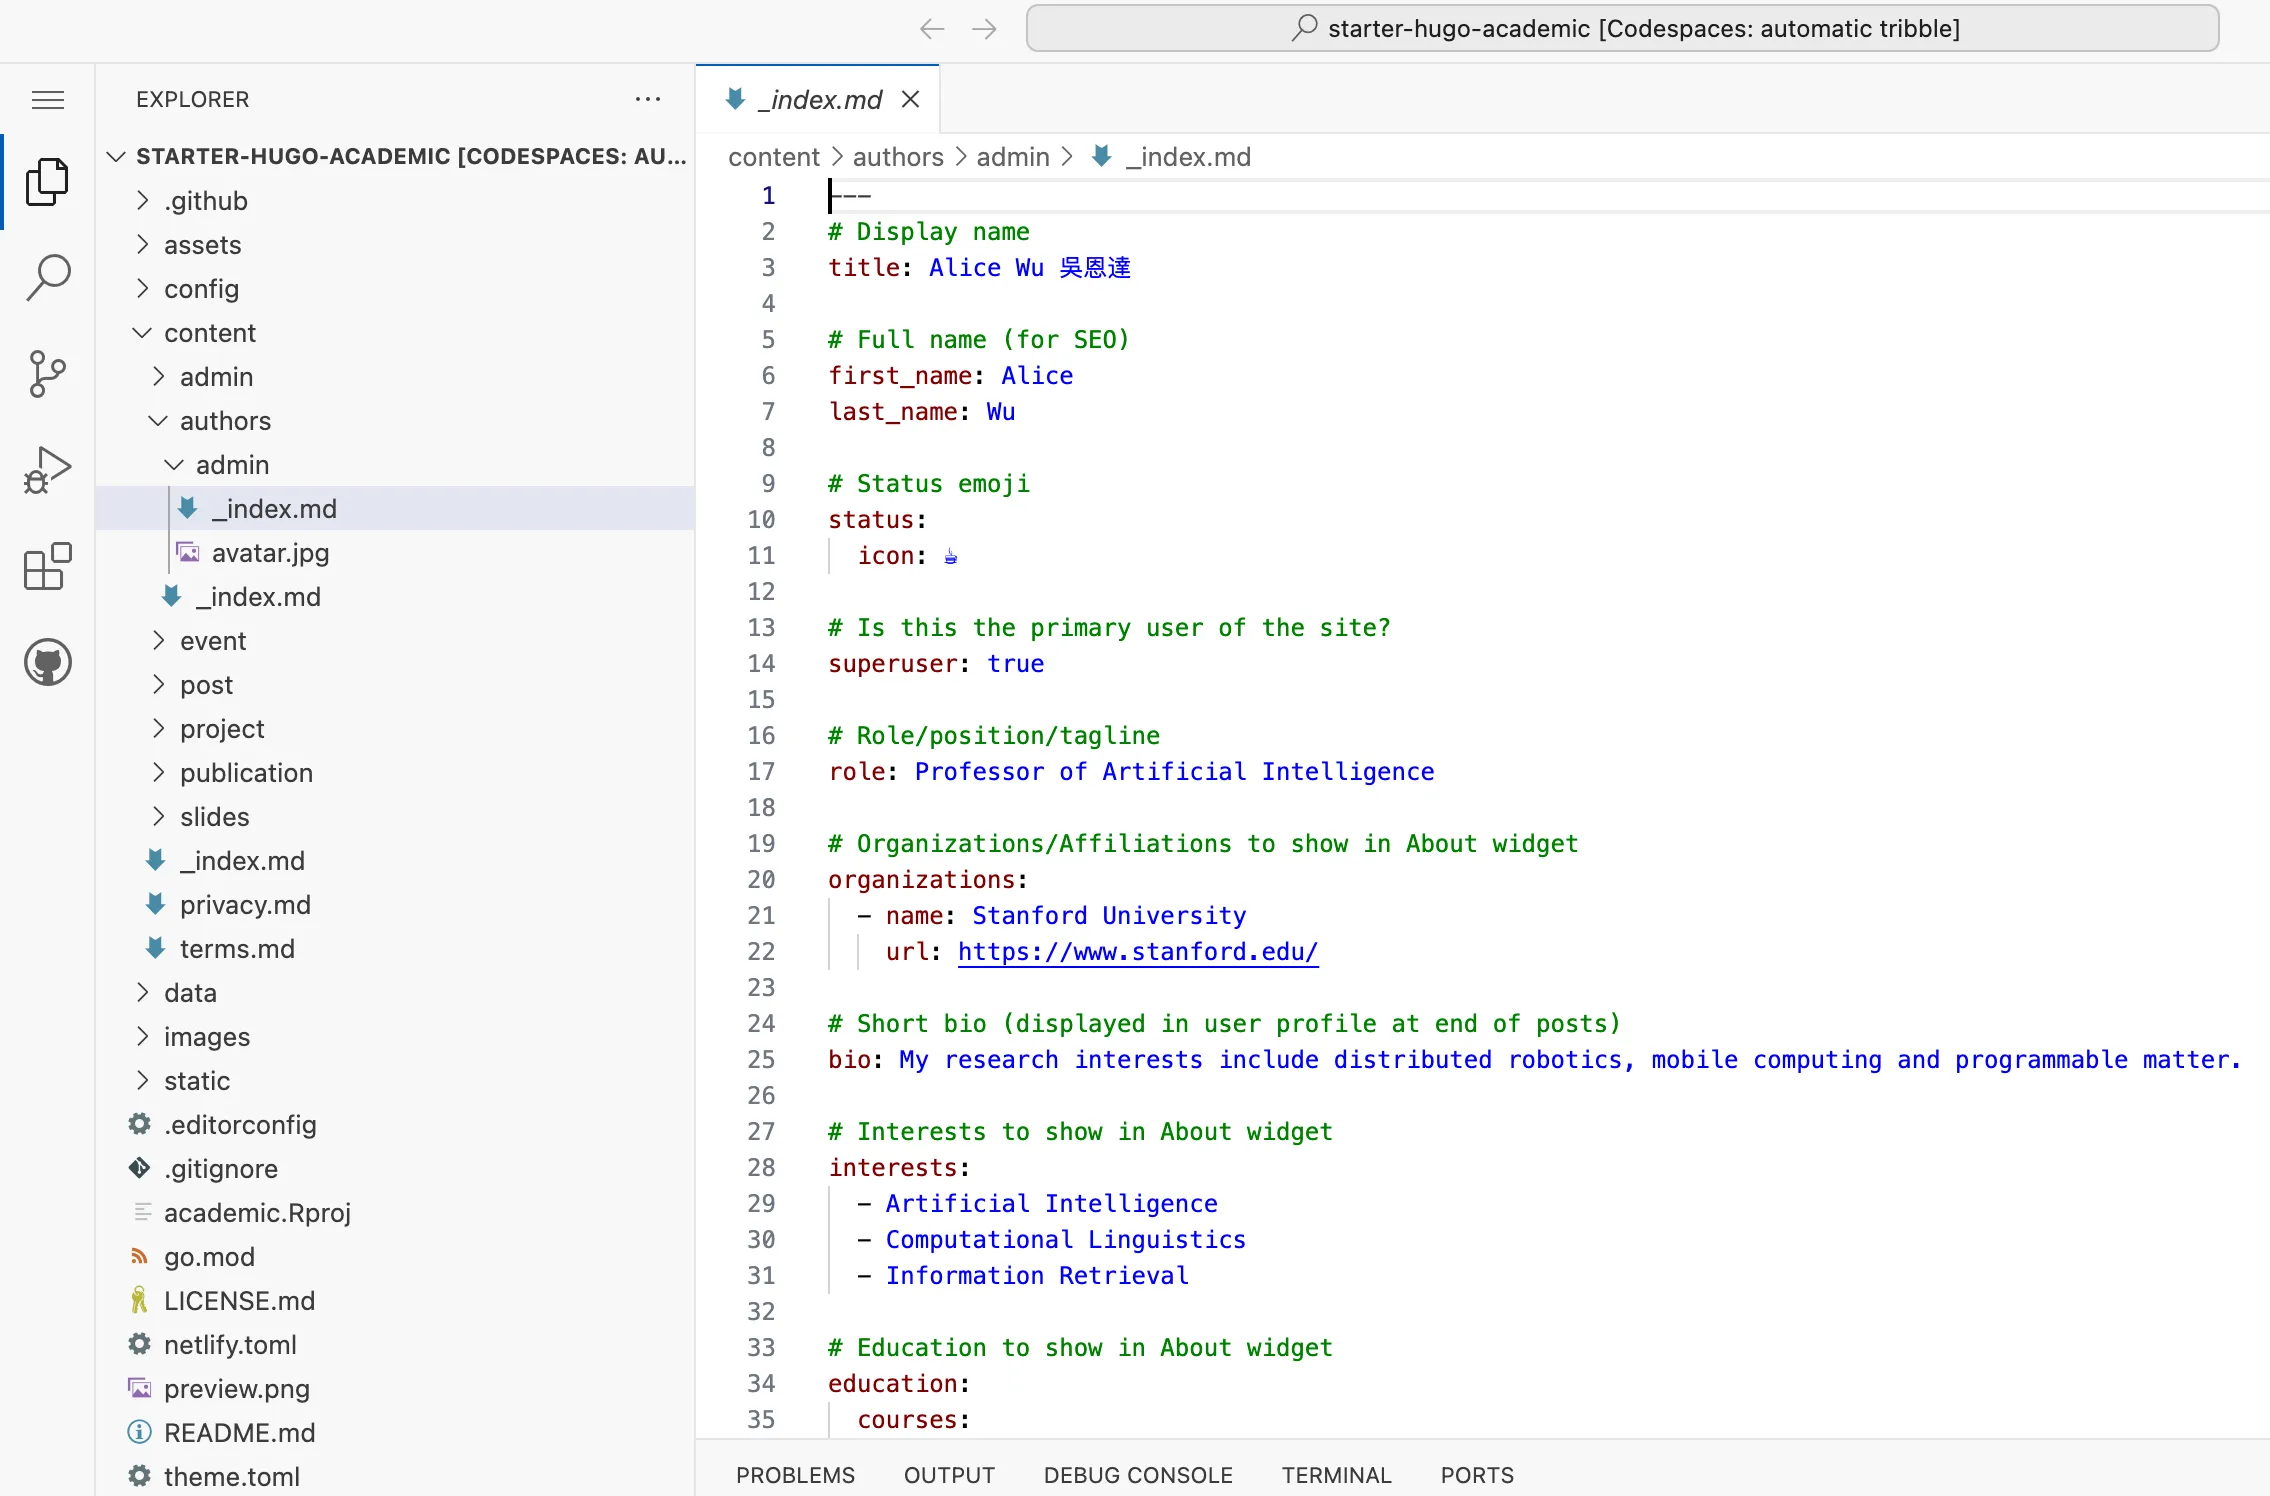
After the editor has loaded, head over to the left sidebar and click on content > authors > admin > _index.md to edit our name and social links:

Name
- In the
titlefield, add your full name or nickname, and include your title (e.g. Prof) if you wish - In the
first_nameandfirst_namefields, add your first and last names in order to help search engines find your site - In the optional
name_pronounciationfield, either write the pronunciation of your name or set it to nothing''- For example, if you have a Chinese name, you can write your name in Chinese in the
titlefield and write the pinyin version of your name in thename_pronounciationfield
- For example, if you have a Chinese name, you can write your name in Chinese in the
Status
- Set an optional status emoji in the
status -> iconfield - you can use your emoji keyboard or copy an emoji. The status emoji can be displayed next to your profile picture on the homepage.
Job
- The
rolefield will display under your name on the homepage. Set it to anything you like, such asData Scientist - Set the optional
organizationsfield to your current place of work or education - this will display under your name on the homepage
Interests
Optionally, add a list of your interests, such as research topics or passions, to display them on the homepage.
Education
Optionally, add a list of your qualifications in education, such as your degrees and the year you graduated each course.
Skills
Optionally, add a list of your skills, such as technical skills or hobbies, to display them in the Skills section on the homepage.
You can choose from a huge library of icons or even add emojis or a custom SVG icons to represent your skills.
Profiles
Optionally, add a list of your profiles, such as LinkedIn, to display them below your name on the homepage.
Resume & Resume Pro: Icons
Update the email address for the at-symbol icon from the example email address to your own email address, or remove that item if you don’t want an email link. Keep the mailto: part - this tells the web browser to open the visitor’s email client.
The following social icons are currently included for Tailwind templates such as Resume and Resume Pro:
- github
- discord
x(Twitter)- telegram
- weixin
- mastodon
- youtube
- arxiv
- google-scholar
- orcid
Remember to type the icon name in lowercase, exactly as it appears above.
Need to link to a different social network?
Simply download the SVG brand icon to your assets/media/icons/custom folder. For example, if you download the Facebook logo to assets/media/icons/custom/facebook.svg, you can enter icon: "custom/facebook" to show the Facebook icon.
Want inspiration? You can download SVG icons from sites like Font Awesome.
Academic CV & Academic CV Pro: Icons
You can choose from a huge library of Font Awesome icons, allowing you to add any social network you like, or any other links your would like to display under your name on the homepage, such as an email link using the envelope icon.
Biography
- Set the optional
biofield to a one-sentence summary of yourself, or set it to nothing''- this will display at the end of your blog posts - Set your main biography that you would like to display on the homepage at the bottom of the file, so that it’s in the body of the Markdown file (after the last
---) rather than in the YAML front matter
Save changes to the _index.md file
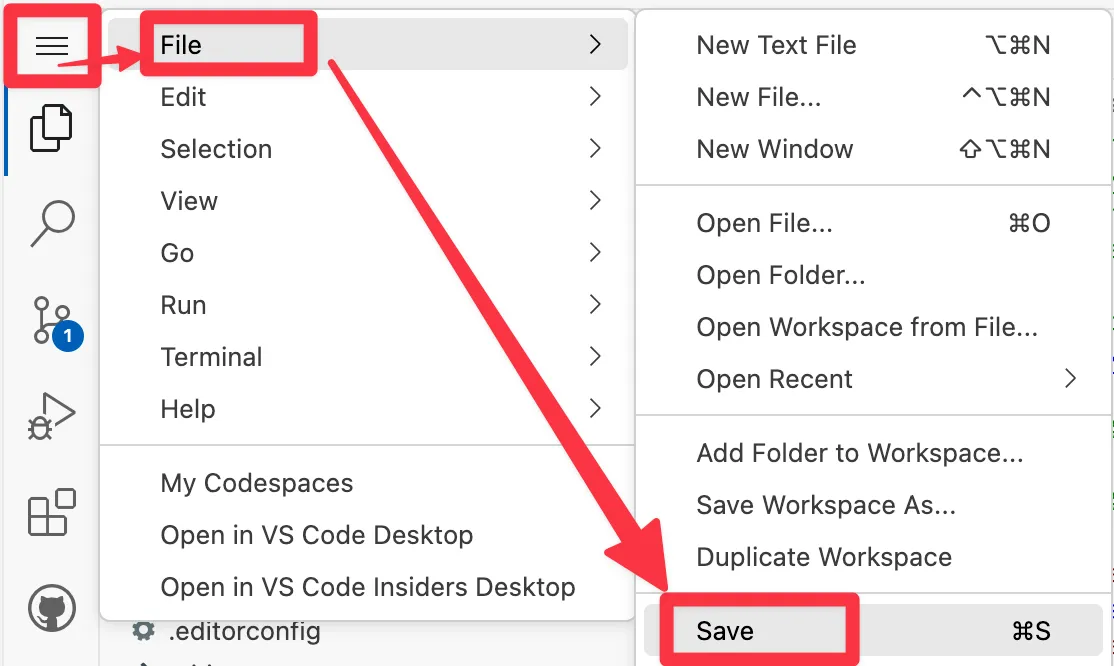
Once you have updated the user details to your own, let’s save the page by clicking on the three bars in the top left and File > Save (or ctrl + s keyboard shortcut):

Add your profile picture
Next, let’s update the profile picture displayed on the homepage.
Right-click the default avatar.jpg and click Delete.
![]()
Drag a photo of yourself (in JPG or PNG format) from your PC to the content > authors > admin folder in the editor and right-click to Rename your photo to avatar.
Add site title
Finally, head over to the left sidebar and click on config > _default > hugo.yaml to edit the site title which will be displayed in the navigation bar.
Add your full name to the title field:

Then save the page by clicking on the three bars in the top left and File > Save (or ctrl + s keyboard shortcut).